Tuesday, August 31, 2010

A little bit SPICY

My mother would spend her summers in New Mexico with her favorite Grandmother.  She has such fond memories of  the Green Chile Peppers that New Mexico is famous for.  Everything at every restraunt has the option of adding the wonderful pepper.  The "pepper farmers" and just about everyone else that lives there will roast the peppers.  My mom has talked about the "wonderful roasted smells" of her childhood.  As I was looking through Homeland's weekly flyer I found an add for "Hatch Green Chile Peppers" at 0.99 a pound or you could buy a case for $18.99!  I knew right then and there that I would be buying a case and that my mother and I would be processing them for later use.  So after work I drove to the Guthrie Homeland (ugh).  The produce woman was very helpful and went through the box with me taking out the rotting peppers and replacing them with fresh ones.


There were SEVERAL steps from start to finish.

STEP 1  Wash Peppers


 STEP 2  Cut off the TOPS and BOTTOMS


STEP 3  Roast Peppers  It is very important to roast these puppies till they are black all over. Don't just have a few black blisters here and there.  Believe me you will thank me in the next step.  You aren't going to burn or ruin them. It's okay if they get soft. 


STEP 4 Place peppers in a paper bag to "sweat" for 15-20 minutes


STEP 5  Place peppers in a bowl full of water and with a knife split the peppers down one side. Take out the seeds and peel the peppers. The skins should just slide off (I don't have any pictures of this process. It took forever and I wasn't thinking about pictures)   Place peeled peppers in a bowl and discard peelings DO NOT PUT DOWN THE DRAIN!  Discard into the trash or your compost pile.


It seems like A LOT of work for not a lot of product, but after they are put in jars you can see how much you really did.

STEP 6  Cut peppers to your desired size and place in clean glass jars leaving 1/2 inch head space. Fill with water to the top of the peppers. We chose to dice most of them and leave the rest whole. The ones we diced we placed in 1/2 pint jars and the ones we left whole are in 1 pint jars.  For half pints add 1/4 tsp of kosher salt and for pints add 1/2 tsp of kosher salt OPTIONAL.
 *Be sure to run your finger over and around the lip of the jar. You are checking for any cracks or nicks. The jars will not seal if there are either of these* click here for picture


STEP 7  Place NEW lids in a pot and bring to a boil  *Don't reuse lids because they will not seal*


STEP 8   *VERY IMPORTANT* With a clean damp rag wipe the rims of all the glass jars. You want to make sure it clean and free of salt or anything else.  The jars will not seal if you skip this step.  Screw on the lid loosely.

STEP 9  Place jars in your pressure cooker. We were able to get all of our 1/2 pint jars in at one time. We used the spacer so we were able to have two rows. I know there were over 20 jars.  We had to do the pint jars in another batch.  Pour 2-3 inches of water into the pressure cooker. Place lid on top and lock it into place.  This is a pretty old pressure cooker.  My mother got it as a wedding gift and didn't use it till last year.


Sadly this is the only picture I have of the closed pressure cooker. 

STEP 10  Turn your pressure cooker on HIGH and bring to a boil. At this time don't place the weight onto the lid yet.  When steam is spurting out of the lid place the weight on top.  The gauge will tell you when to start timing.

STEP 11  Once your gauge has reached 15 lbs start timing.  You will process the peppers at 15lbs for 35 minutes.  When 35 minutes have passed TURN OFF the burner and very carefully take off the gauge.  Make sure you remove it away from your face.  A LOT of steam is going to escape and can BURN YOU if you are not careful.  After all the steam has escaped let the pressure cooker sit undisturbed for a couple of hours. You will hear "pops" and "metallic clicks" those are the jars sealing. 

STEP 12 Unlock the lid and take the jars out and place on a towel so they can cool completely. Don't shake or mess with the jars until they are completely cooled.  The jars that didn't seal in the pressure cooker should seal once they have set for a bit and cooled off.  To make sure you have a seal with your finger press the top of the lid. If it moves up and down or makes a noise it did not seal.  After they have cooled for several hours screw the lids on tight and  take a damp dish towel and wipe the jars clean.  Make sure to date the top of your lids.


We are super excited at how they came out.  They look just like the green chile's you can buy in the small tin cans.  After we had completed the process we both decided we would do this again.  The hardest part was peeling the skins off.  We didn't get them completely black, so they didn't just slip off.  They took forever and by the end my back was killing me. We had a jar not seal and instead of getting a new lid and processing it again we put it in the fridge and used it over the next couple of days.  THEY WERE DELISH!


Monday, August 30, 2010

I'll Stand by You

This was a total and complete impulse by from Goodwill.  I was in the check out line and on top of the racks I saw this little beauty.


 For only $1.99 I could not pass it up!  Solid wood people (I have no idea what kind, my father could tell you)  I had big plans for my new candle stand.

I started with two coats of white spray paint.  It was 0.97 from Wal-Mart.


I let it dry for about 5 hours and then with a cloth, rubbed stain all over. I don't have a picture because I was by myself and had stain all over my hands.  I let the stain sit for about 10 minutes and then wiped, wiped, wiped. I let any remaining stain dry for a few more hours and then took a sanding block to it and TA DA!


I was a little worried that I got a little sand happy, but looking at it on my shelf and with things, I think it is perfect!  I LOVE this and am not ashamed to say I am a little obsessed with it.  So for about $3.00 I have an amazing new piece.  (I already owned everything else for this project)

Wednesday, July 28, 2010

Green Tomato Cake

Green Tomato Cake

Ingredients

4 cups chopped green tomatoes
1 tablespoon salt
1/2 cup butter
2 cups white sugar
2 eggs
2 cups all-purpose flour
1 teaspoon ground cinnamon
1 teaspoon ground nutmeg
1 teaspoon baking soda
1/4 teaspoon salt
1/2 cup raisins
1/2 cup chopped walnuts

Preheat oven to 350 degrees F (175 degrees C). Grease and flour a 9x13 inch baking pan.
Directions
1. Place chopped tomatoes in a bowl and sprinkle with 1 tablespoon salt. Let stand 10 minutes. Place in       a colander, rinse with cold water and drain.


It produces a lot of liquid.

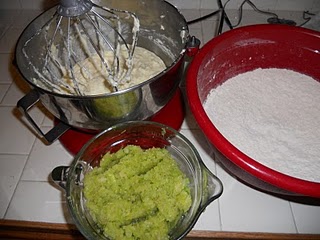
2.  Place chopped, salted and drained tomatoes into a food processor and process until it's in tiny bits

I placed all this into a smaller colander and drained off the remainder of the liquid.  It produced even more than when I salted them. (Don't salt again)

3. Cream butter and sugar. Add eggs and beat until creamy.

Butter


Butter and Sugar


Butter, Sugar & Eggs

4. Sift together flour, cinnamon, nutmeg, soda and 1/4 teaspoon salt. Add raisins and nuts to dry mixture; add dry ingredients to creamed mixture. Dough will be very stiff. Mix well.


5. Add drained tomatoes and mix well. Pour into the prepared 9 x 13 inch pan.


Bake for 40 to 45 minutes in the preheated oven, or until toothpick inserted into cake comes out clean.


Sorry I didn't get a picture before people started cutting into it...it was just that good!

I was going to frost this with a cream cheese icing, but I tasted it and decided it could stand alone.  I might add the icing next time, by the end of making it I was pretty tired and I had to work later, and that played a big part in not icing.  I forgot to put in the nuts I was going to use pecans because I am allergic to walnuts. The original recipe calls for 2 cups chopped tomatoes, I went an extra step and finely processed them.  It wasn't until I was processing the last cup that I realized 2 cups of processed tomatoes equals 4 cups of chopped tomatoes.  Yep you guessed it, I had to double the recipe. It turned out wonderful because I was able to have a cake for my family and one for work.  Both cakes were gone in the morning!  It was super fun to have the people at work try and guess what the "secret" ingredient was. I am thankful I took the extra step and put them in the food processor. I think that the chopped pieces would have been too big and the tiny ones gave the cake just the right amount of texture and helped make it SUPER MOIST!  I love this cake!  It's definitely one I will keep using again and again. Towards the end of the summer my garden is almost dead, but I have TONS of big green tomatoes.  I love the ripe red ones, but it's nice to have a little variety to spice things up.

I found this at allrecipies

Monday, July 19, 2010

Typing into my heart

I love Pottery Barn.  I mean LOVE IT!  As you know I have begun a life of thrifty shopping and saving money.  Pottery Barn does not condone my lifestyle.  So as I was stalking looking at some awesome blogs I came across this beauty from Holy Craft.  I knew in that instant I had to make it.  So I began the simple steps.  I had the font on my computer already so I typed it up and printed it off on card stock.  I the size I chose was 300, I know it sounds huge, but I found it to be perfect for the size of the squares.


I then used the most amazing thing known to the craft world...the Martha Stewart Circle Cutter. Yes it is a piece of crap and yes I have had to replace it twice, but believe me it has made cutting out these circles a snap.  They are round (a feat that wouldn't be accomplished if I free styled it) It goes all the way up to 5 1/2" circles.  Pretty amazing for my circular needs. I got at Wal-Mart on clearance for $11.00.  I am thinking that the overall quality has knocked it down to $7.00 in less than a week.  Still a good buy until I can find a better model.


Roughly 20 minutes later I was left with these treasures.  I took a black sharpie and colored in any white lines that were not supposed to be there and colored the sides so they are all black...I know, I know I obsess. I managed to cut out all but 10 to my standards.  That just means I have to print and cut again.  Pretty dang easy.


Now to my board.  My father is a woodcrafter/whatever and he has tons of wood in either workshop.  We managed to find a 24X25 piece of plywood that was PERFECT. It needed to be trimmed one inch.  You know the old motto measure twice, cut once...it wasn't used with that piece.  Because he is amazing he picked up a piece and cut it to the perfect 24X24 square.  He also scored the entire board so I am left with perfect 4x4 squares.  Please see the picture below... I know I have mind blowing math skills and I may have lost you.


I have never stained anything in my life...well OK, mustard gets me every time, but I am new to the wood stain.  Let me tell you it's not something you want to rush into. I found out a bit late that it is best added with a gentle hand.  There are parts that don't have that brushed on blended look.  Thank the Heavens for second coats. After I let the stain dry I took a little Modge-Podge and went to town!  I ended up framing it out with an old piece of wood I had laying around.  I think it gives it a more finished look. I pretty much LOVE THIS!


When I finish my buffet I will show you what this bad boy looks like in it's natural habitat, but for now this will have to do.

Monday, July 12, 2010

Oh tomato I'm gonna miss you most of all....

I recently found out I am allergic to tomatoes. IT ROYALLY SUCKS!  When I eat a fresh tomato face breaks out into the really pretty itchy rash and my mouth gets little blisters and feels like it's on fire.  Sadly I had a few tomatoes this weekend before the side effects really kicked in and I am again starting a steroid dose pack....lovely.  In the garden I have about 10 different tomato plants and they give juicy red jewels everyday!  LOTS of them!


There were probably about 20 more from Sunday's harvest. I love how they are on the vine. For the first time this year we planted heirloom tomatoes.  They are big, juicy, beautiful, striped treasures. Slice them up, sprinkle a little kosher salt and fresh cracked pepper and you have an AMAZING side dish for your summer dinner. 


Doesn't the plate just sing!  I was able to eat about half of this little beauty before I had to stop.  Believe me there was not a shortage of takers to finish it.

I think my favorite tomato dish is a caprese salad.  Oh the flavors of soft mozzarella, fresh basil and a sweet tomato drizzled with olive oil and balsamic vinegar. If you sprinkle this with a little kosher salt and fresh cracked pepper and I swear you will think you are in Heaven!  Ugh! I hate being allergic to everything!


There is also a pizza that is pretty dang close a caprese salad....the margherita pizza.  It's gooey and pretty perfect.


I really don't have it all bad, I am going to see an allergy specialist and hopefully she will cure me so next year I can partake in the tomatoey goodness that is usually my summer.